Copilot Studio, Unlocked: Licenses, Credits & First Steps
A clear-eyed guide to what licenses you actually need and how to build your first agent
What is Copilot Studio?
Microsoft Copilot Studio is the low-code platform for building AI agents that don’t just respond — they act. Whether you’re extending Microsoft 365 Copilot, wiring up custom APIs, or orchestrating multi-agent workflows, this guide gets you from zero to first agent with a clear-eyed view of what licenses you actually need.
Copilot Studio sits at the intersection of conversational AI and business process automation. Built on the Power Platform, it lets you design agents using a visual canvas, natural language, or code — then deploy them to Teams, websites, Dynamics 365, or any custom channel via API.
As of 2025, Copilot Studio supports two orchestration models:
- Classic orchestration — deterministic topic-based flows
- Generative orchestration — the LLM dynamically decides which topics and actions to invoke
For new builds targeting agentic scenarios, generative orchestration is the default and recommended path.
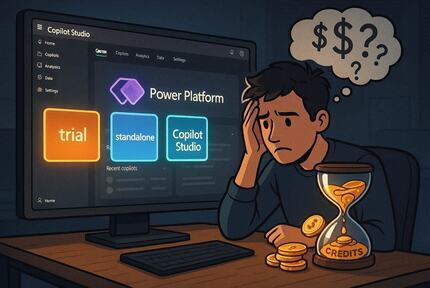
Key rename (Sept 2025): Microsoft renamed the billing unit from "messages" to Copilot Credits. The quantity per pack stayed the same — only the terminology changed. All current documentation uses Copilot Credits.
Understanding the license model
Copilot Studio licensing has two dimensions: who builds (maker licenses) and how much runs (consumption credits).
You need both in production.
Maker licenses (who can build)
Every developer who creates or manages agents needs a maker license. There are three ways to get one.
- Create and test agents
- Test chat panel only
- Cannot publish agents
- No premium connectors
- All channels and connectors
- Generative AI features
- Multi-agent orchestration
- Requires tenant license too
- Teams channel only
- Classic orchestration
- Dataverse for Teams
- No premium connectors
- No generative features
Two licenses required for standalone: A tenant license (one per org) AND a user license (per maker). Assign both through the Microsoft 365 Admin Center under Billing → Purchase services → Copilot Studio. Guests cannot access Copilot Studio.
Copilot Credits (how much runs)
Credits measure the compute effort of each agent interaction — retrieval, reasoning, action execution, tool calls. They’re consumed whenever a user talks to an agent or an agent acts autonomously.
Three ways to supply them:
End users don't need a license. Only the makers who build agents need maker licenses. Employees or customers chatting with your agent are unlicensed — you pay in credits per interaction, not per end user. This is important for cost modeling at scale.
Feature comparison by plan
| Feature | Trial | Teams plan | Standalone |
|---|---|---|---|
| Create agents | ✓ | ✓ | ✓ |
| Publish agents | ✗ | Teams only | All channels |
| Generative AI / GPT | ✓ | ✗ | ✓ |
| Premium connectors | ✗ | ✗ | ✓ |
| Multi-agent orchestration | ✓ | ✗ | ✓ |
| Power Automate flows | ✓ | Standard only | ✓ |
| Custom channels / API | ✗ | ✗ | ✓ |
| Dataverse included | ✗ | D4T only | 15 GB |
Setting up your environment
Copilot Studio runs inside a Power Platform environment. You’ll need at least a default environment to get started, but for any real project you should provision separate environments for development, test, and production.
Start your trial or get licensed
Go to copilotstudio.microsoft.com and sign in with a work or school account. Personal email addresses are rejected. If self-service sign-up is disabled by your IT admin, ask them to enable the AllowAdHocSubscriptions flag in org settings.
Provision a Power Platform environment
Navigate to the Power Platform Admin Center (PPAC) → Environments → New. For dev work, a Developer-type environment gives you full Dataverse without consuming production capacity.
Assign licenses in M365 Admin Center
For standalone: purchase the Copilot Studio tenant license first, then the Copilot Studio User License (free) per maker. Assign via Users → Active users → Manage product licenses. Or scope to an Entra security group for bulk assignment.
Link a billing policy for credits
In PPAC, go to Billing → Billing policies → New. Link your Azure subscription and attach the relevant environment. This enables either pay-as-you-go metering or draws from your capacity pack.
Build and test your first agent
In Copilot Studio, click Create → New agent → describe what it should do in natural language. The platform generates a starter topic set. Use the Test your agent panel on the right to iterate before publishing.
Connecting external systems
One of Copilot Studio’s main strengths is its connector ecosystem. You can call external APIs, trigger Power Automate flows, and invoke Azure AI services — all from within a topic or an autonomous action.
# Call an external REST API from a topic action
kind: AdaptiveDialog
actions:
  - kind: InvokeFlowAction
    flow: "/providers/Microsoft.Flow/flows/{flowId}"
    inputs:
      query:    "=${System.Activity.Text}"
      userId:   "=${System.User.PrincipalName}"
    outputs:
      result:   FlowResponse

# Or call a custom connector directly
  - kind: InvokeConnectorAction
    connector: "shared_myapi"
    operation: "GetComplianceStatus"
    inputs:
      aerodromeId: "=${Topic.AerodromeId}"
Connector auth scoping matters: Office 365 connectors in Copilot Studio default to maker credentials, not end-user credentials. If your agent needs to send email as the signed-in user, explicitly configure the connection to use end-user OAuth. This is a common source of confusion in Teams-deployed agents.
Developer pre-flight checklist
Before going into your first build, confirm these are in place:
- Work or school Microsoft 365 account (no personal email)
- Access to Power Platform Admin Center (System Admin or Environment Maker role)
- Copilot Studio tenant license assigned to your org (or active trial)
- Copilot Studio User License assigned to your account
- Dedicated Power Platform environment (non-default recommended for dev)
- Billing policy created and linked to environment (required to consume credits)
- Azure subscription available if using pay-as-you-go metering
- DLP policies reviewed in PPAC (these can block connector usage silently)
- For M365 extension: M365 Copilot license on the agent-publishing account
Cost planning tips
The most common licensing pitfall is underestimating credit consumption once you add generative features. A few practical strategies:
Pilot on pay-as-you-go first
Before committing to a capacity pack, run 2–4 weeks in PAYG to measure your actual credit burn. Every API call, tool invocation, and generative response contributes differently — you can't model it accurately without real traffic.
Watch backend action costs
Power Automate flows triggered per turn add up fast. If your flow calls Dataverse or an external API on every message, consider batching context at session start rather than fetching on every utterance.
Use the Microsoft usage estimator
The official Copilot Studio agent usage estimator (linked from the licensing docs) lets you model credit volume by agent type, traffic, orchestration mode, and tool usage. Run this before buying a pack size.
Official docs to bookmark:
learn.microsoft.com/microsoft-copilot-studio/billing-licensing — authoritative licensing reference
learn.microsoft.com/microsoft-copilot-studio/requirements-licensing — getting access and trial sign-up
Microsoft Copilot Studio Licensing Guide (February 2026) — full PDF via Microsoft CDN
Last updated May 2026 · Licensing details subject to change
Subscribe via RSS
Comments